This post contains affiliate links.
You are newly engaged and excited to share the news with family and friends. However, this quickly fades, and some couples become anxious and overwhelmed when realizing they have no idea where to begin in the planning process.
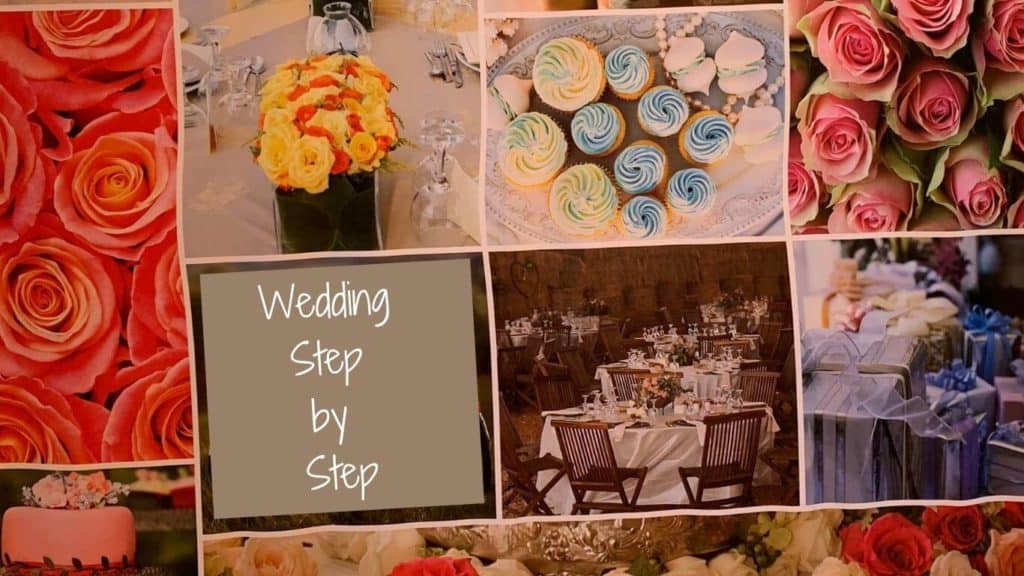
There are 20 practical steps to do from the beginning that will help make the planning process fun, organized, and on budget. Each of the 20 steps will allow you to plan every detail and know what needs to be done. So, execute steps 1-20 and enjoy every moment of planning your wedding.
Most couples get the first four crucial steps of planning their wedding out of order. Set a budget, pick a theme, pick a venue, and decide on the date. Here are the steps and the order to follow.
Step 1 – Decide on a Budget: How to plan for expenses?
Decide on who will participate in financing the wedding and collaborate on the “money discussion.” Again, this is a time to have a real heart-to-heart and if parents are funding the wedding, determine early on the involvement level, so there is no confusion and turmoil later.
It’s important to know what needs to be booked and paid first. Understand the deposit amounts due and when they are due. For example, to secure a date, a deposit must be paid.
Here is a sample chart to help organize the payment/deposit schedule:
| Deposit/Payment Booking Schedule | Oct – Engaged | Nov | Dec | Jan | Feb | Mar | April | May | June | July | Aug | Sep | Oct -Wedding |
| Budget Planning | $ | ||||||||||||
| Wedding Planner/Day of Coordinator | $ | ||||||||||||
| Venue/Food & Beverage Deposit | $ | ||||||||||||
| Vendor Deposits (Photographer, Florist, DJ, Officiant, Cake, etc.) | $ | $ | $ | $ | $ | ||||||||
| Wedding Dress | $ | ||||||||||||
| Honeymoon Reservations | $ | ||||||||||||
| Invitations | $ | ||||||||||||
| Wedding Bands | $ | ||||||||||||
| Honeymoon Balance Due | $ | ||||||||||||
| Vendors’ Final Balances Due | $ | $ | $ | $ | $ | ||||||||
| Venue/Food & Beverage Final Bal. Due | $ | ||||||||||||
| Marriage License | $ | ||||||||||||
| Beauty Treatments (Hair, Nails, Spa Day, Tan) Plus Vendor Tips | $ |
Check out my article I wrote on average wedding percentage costs.
There are many excellent wedding budget Apps. Brides.com has a list of the 19 best Apps they recommend.
Once you have accomplished a budget for your wedding, it does take a lot of stress off the planning process. It also makes all the moments more enjoyable; you now know what you can and cannot spend so the money doesn’t run out.
Step 2 – Pick a Theme for your Wedding: What is your vibe?
Instagram and Pinterest are great places to start and help you determine what you like and don’t like. Then, put together a binder of ideas and have fun.
- Beachy
- Rustic
- Vintage
- Formal
- Winter Wonderland
- Halloween
- Backyard
- Spring Brunch
- Destination
Step 3 – Pick a Venue: Match your style with the venue
Deciding on your budget, and picking your theme and vibe first is essential to narrow down the search. The average couple will tour two to five venues before deciding and putting down a deposit. Read my article on food and beverage minimums with sample estimates.
Get an estimate/proposal from each venue based on the desired date and guest count before the tour to know if you are within budget. You can also use the estimates as leverage and a negotiating tactic with other venues. For example, ask if they will price-match or include upgrades for the ceremony/reception chairs, or an additional appetizer, etc.

Below is a downloadable spreadsheet to help you keep track of the venues you tour, and take organized notes along the way.
Step 4 – Pick a Date: Decide on the venue before the date
When touring venues, have at least three dates that will work for your wedding day. If you were to decide on a date first, you would be disappointed if the venue was not available. This can be frustrating. Here are some factors to keep in mind when deciding on a date:
- Confirm family schedules
- Work Schedules
- Holidays/Vacations
- Budget Constraints
- Education/ School Schedule
When calling or emailing potential wedding venues, ask if they can put a “soft hold” on the date before scheduling an upcoming tour. Most venues will do this if you plan a tour within the week. Be sure to bring all decision-makers to the tour and know the deposit required to hold the date ahead of time. Lastly, get a list of your questions together before the tour.
Read my article on wedding reception halls and 35 things you should ask before booking a venue.
Pick a day for the tour when setup is taking place for another wedding. This is an excellent opportunity to get a visual of the general layout.
Step 5 – Pick your Wedding Party: Make sure they are available
You most likely have dreamed about your wedding party for quite some time by this point. It’s always good to run some dates past “your favorite humans” when finalizing the wedding date from the get-go.
Step 6 – Guest List: Who makes the cut?
By this time, you know your budget and how many guests you can afford to invite based on the venue proposal you have already received. Keep in mind that 20% of the guests invited cannot attend the wedding.
Don’t forget to add yourself to the total guest count. I was always surprised how many couples were not aware they were included in the total headcount for food and beverage purposes.
Step 7 – Get Social: Spread the word
I love wedding websites. There is always one person in the relationship that is tech-savvy and can build a website in minutes. Here is a link to bluehost.com to get started and build an affordable, simple, and beautiful wedding website to share with family and friends. Keep everyone in the loop and up to date on one easy platform. Or, another option is to set up a separate wedding Facebook page or an Instagram Account.
Step 8 – Save the Date: Spread the word
This is where a wedding website comes in handy, or you can mail out save the date announcements. Minted.com has a beautiful online wedding selection.
It’s recommended that save-the-date announcements are sent out 4-5 months before a local wedding and 7-12 months before a destination wedding. Important information to include:
- Name of the happy couple
- Wedding Date
- Wedding Location
- Include a wedding website or social media links
- Also mention that the formal invitation will follow

Step 9 – Mail out Invitations
One-stop-shopping online with Minted.com for your invitation needs.
Mail out the invitations 8-12 weeks before the wedding. This way, you will get RSVPs back in time to provide the venue with the total guest count. Most venues will require the final headcount 2-3 weeks before the wedding date, plus the entire balance paid in full.
Tip – Most venues will not accept a personal check 2-3 weeks before a wedding, so you must pay by credit card or cash.
Step 10 – Choose your Vendors
Check with your venue and ask for a preferred vendors list. Read my article on Best Wedding Vendors. Typically vendors need to be booked between 6-12 months prior. If you hired a wedding planner from the very beginning, they were all over this task from the start.
Important vendors:
- Wedding Planner/Day of Coordinator
- Caterer if not included with the venue
- Photographer – Videographer – Photo Booth
- DJ/Music
- Florist
- Bakery
- Officiant
- Transportation
- Hair & Makeup Team
What is the difference between a wedding planner and a day-of coordinator?
Wedding planner – Works with a couple from the beginning and handles every detail from the venue, theme, design, and booking vendors. In a nutshell, holds the couple’s hand from start to finish. Read my article on What Does a Wedding Planner Do For You?
Day of Coordinator – Usually hired for a certain amount of hours and will have consultation meetings about 6-8 weeks before the wedding. The primary responsibility of the day of coordinator is to execute each step according to the wedding timeline. Therefore, the bulk of the coordinator’s work is done on the wedding day.
The day of coordinator is more big picture duties, and the planner is both big picture, task-oriented, and everything else in between.

Step 11 – The Dress: When to say “yes” to the dress?
Pick out your wedding dress 6-9 months before the wedding. Fittings are usually 10-12 weeks before the wedding, and the final fitting is 10-14 days before the big day.
Grooms
Grooms and groomsmen should order suits four to five months before the wedding to allow plenty of time for alterations.
Step 12 – Menu & Cake Tasting
Menu Tasting
The menu tasting can occur 12 weeks before the wedding or approximately three months prior. Have the tasting done at least one month before the wedding to confirm any special requests with the chef. A month gives the chef time to order any unique ingredients needed that are not generally in stock regularly with either the venue or caterer. Also, discuss any dietary restrictions for either you or your guests that are gluten-free, vegan, vegetarian, etc.
The menu tasting is also a good time to pair wines with the menu, and the chef can provide their recommendations. Make sure the wine list decided on are wines that are regularly in stock and don’t need to be specially ordered for the wedding. Check out my must-read article on offering an open bar and shots to your guests.
Typically there is a limit to how many people can attend a menu tasting. The average number is 2-4 people. Some venues and caterers do not hold menu tastings on the weekends since these are busy event days. Usually, menu tastings are conducted in the evenings on a weekday.
Cake Tasting
Cake tastings are usually held any day of the week and about five to six months before the wedding. This is a fun event for the couple to do together. It’s also a great time to sample an assortment of delicious desserts if you are considering something other than a traditional wedding cake.
A small cutting cake and a variety dessert bar are good options. However, a dessert bar can require additional setup time. Get both a delivery and setup quote from the bakery if considering this option.
Step 13 – Wedding Registry
Have the wedding registry completed eight to nine months before your wedding. Ensure the registry is done well before an engagement party or a bridal shower. An engagement party is optional. Read my article on “Do you Bring a Gift to an engagement Party?”
Step 14 – Bridal Shower & Bachelor/Bachelorette Party
Work together with your wedding party that all dates work with everyone involved, especially parents and other significant family members. For example, a bridal shower can be two weeks to two months before the wedding. Bachelor and Bachelorette Parties can be one to three months before the wedding.
Additional Events
This is also the time you should be finalizing honeymoon plans and the rehearsal dinner, and consider an intimate brunch the day after the wedding with family.

Story Time:
Don’t plan a bachelor or bachelorette party the night before your wedding. In 2018, I worked with a couple in Orange County, CA, where the groom was late for his wedding. Yup, this happened.
Two days before the wedding, the groom went to Mexico with four other groomsmen and got so drunk he overslept. The groom didn’t answer any of the bride’s frantic phone calls, and honestly, we thought he would ditch the wedding and not show up.
Finally, 30 minutes before the wedding ceremony was scheduled to begin, the groom called to tell me he was on his way back from Mexico with his buddies and they would be arriving an hour and a half late. He had a whole list of excuses, and honestly, none of them made the situation any better.
I went to the bridal suite to tell the bride the news, and the poor thing was hysterical. The maid of honor and the bride’s mother were consoling her. The bride was sobbing and saying, “he ruined our wedding, he ruined our wedding.” Then I heard the maid of honor say, “you don’t have to do this.”
Fifteen minutes later, the wedding was still on, and we ended up having the cocktail hour first for the 145 guests while we waited for Prince Charming to grace us with his presence.
The groom finally showed up, and the bride’s three brothers were waiting for him in the parking lot when he pulled up. I thought the groom would have a bloody lip and a black eye for the wedding photos, but that didn’t happen. At least not before the ceremony.
I still feel guilty sending this sweet bride down the aisle to this very day.
Step 15 – Marriage License
File for the marriage license a week to 90 days before the wedding at the local county clerk’s office. Couples should review the “what to bring list” on the county clerk recorder’s website to be prepared. For example, driver’s license, birth certificate, etc. Typically both walk-in and scheduled appointments are accepted.
Step 16 – Pick out Rings
Shop together for your wedding bands at least four months prior. Often times this is forgotten until the very end.
Step 17 – Hotel Room Block
If the venue is at a hotel or near a hotel, inquire about a room block for your guests. A hotel will negotiate with you on a discounted set rate for a hotel room per night which is usually done in blocks of ten. This makes it convenient for your guests to call the hotel, reserve their room, and pay for accommodations. Once the initial block of ten rooms is booked, another block of ten rooms can be set aside at the same negotiated rate.
One venue I worked at was three miles from a hotel, and the hotel included free guest parking and complimentary shuttle service for the wedding guests that went back and forth at set times, with the last shuttle departing the venue at 11:00 pm. This was ideal since the wedding ended at 10:00 pm.
Make sure you understand the terms of the agreement with the hotel, so you are not paying out of pocket for any unbooked hotel rooms or cancelations by your guests.

Step 18 – Final Venue Walk Through
Meet with your planner, day-of coordinator, or the point of contact (POC) at the venue and run through your final questions. Ask if any setup items, for example, centerpieces, seating chart, etc. can be dropped off the night before the wedding. Also, ask if you can get access earlier than the contracted time to set up. Often, the venue will allow it if another event isn’t booked before your wedding. This is a time to make sure both “team wedding” and the venue are on the same page regarding expectations.
Step 19 – Confirm with Vendors
Five to seven days before the wedding, confirm with all vendors and forward your vendors the day of timeline. Click here to view my sample day of wedding timeline template. It’s based on a 5:00 pm ceremony start time, and it can be tweaked to accommodate your specific wedding schedule.
The template also includes a vendor contact template. This is important to add as an attachment to the wedding day timeline, so you have all contact information for each vendor and the agreed upon arrival times on the wedding day.
Step 20 – Beauty Treatments & Vendor Tip Envelopes
It’s now a few days before the wedding, and a time to relax and enjoy the moment. So book a spa day and get beatified (hair, nails, the works).
Check out my article on vendors and review the suggested tip chart.
Conclusion –
This is such a wonderful time so enjoy every moment in the planning process. A piece of advice for both brides and grooms. Whoever that special person(s) is who was selected to walk with you down the aisle, take at least 5 minutes alone with them before the ceremony starts. Maybe it’s a parent, grandparent, Godparent, etc. Have five minutes alone and soak in the love and the lifetime of memories you have both shared.
It’s a sacred time, and quite possibly the only five minutes you will have alone with one another the entire day.
~ Happy planning and enjoy your wedding day steps ~